Tuesday, January 18, 2011

Baby Towel Tutorial

Although I have a few baby towels from when the boys were babies, I wanted something for a little girl.  So, I went on the hunt for some fabric to make a towel or two.  I found this towel at Target on clearance for $4.98, about 50% off along with six matching washcloths for even less.  Make sure that you buy a towel that is large enough to be cut in half.  These are nice thick towels, not like alot of baby towels that are very thin.


 I figured that if I could cut the towel in half I could make two towels.


I went ahead and cut the thick corners of the washcloth off so that when I sewed everything together it wouldn't be too thick and inhibit my sewing.


Now it was time to fold the washcloth in half to form a triangle.  Once you have the triangle you will need to place it in the corner of the towel.  I had a raw edge from cutting my towel in half, so I did place my triangle so that it layed in a raw edge corner.


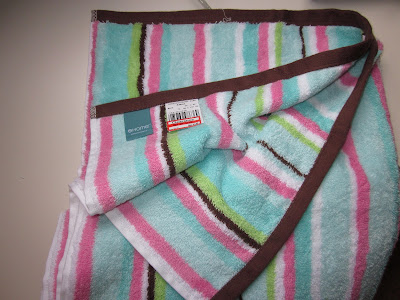
I had some extra binding from a bib I made, so I used it to cover my raw edge and the adjacent side.


Make sure that you pin the binding. If you like to be lazy sometimes...I know I do...you might be tempted to just start sewing, but I it is easier in the long run if you pin.  The towel fabric is thick enough that it doesn't stay in place easily.


Start sewing!


Then you have your little towel.  It is a fun, quick and easy project.  If you want you could bind it all the way around.  I was just using my left-overs and I like it just fine this way.

So, for about $8.50, I was able to make two baby towels that I love!  That sure beats the $15/ towel price for most thick baby towels.


Baby Girl Dress


I was so excited when I saw the pattern for this dress on Made By Rae's sewing blog.  I really wanted to have a dress small enough for my newborn baby to wear.  (Basically, just for pictures.)  With my two other kiddos they always swam in their newborn clothes for a little while.  So, I thought it would be fun to have a dress that might actually fit her.


I was so intimidated to try to sew a dress, because I thought it would be really hard. Thanks to Made by Rae's pattern for the Itty Bitty Baby Dress, I was inspired to tackle my first dress.


I also learned some tips on how to make simple ruffles at Ruffles and Stuff.  I am all about learning from other peoples tutorials, and coming up with things that I love.


 I actually sewed this dress a few months ago, but last night put the final touch on it by adding some trim on the bottom.  I wasn't sure if I wanted to do something basic or another ruffle. I decided on something simple.  I am happy with how it turned out.  Hopefully, it will fit my little girl.  She is due any day now!

Ikea Shade Redo


 This lamp shade sat in my laundry room awaiting a purpose for about a year before I ended up using it. I found it for $1 in the As-Is section at Ikea. I loved it, but then realized after I bought it that it didn't let much light out.  So, I decided to recover it.
I tore off the velvet fabric, which loosened the metal rings that support the inside of the lamp. I was a little worried about this at first, but then decided to take it apart completely.


This is what I ended up with.  The lamp shade rolled out completely flat.  I laid out my fabric, sprayed it with spray adhesive and let it sit for the required time. Then I laid the plastic lamp lining out on the fabric.  After this I used my glue gun to glue the raw edges down.  It still looked a little unfinished. When light was shining from the inside I didn't want to see the shadow of the raw edges. To fix this I glued some off white ribbon down on the raw edges.  


At this point I glued the round metal supports back into the lampshade with a glue gun. I didn't take a picture of this part, but I did use binding clips to help keep it in place while the glue hardened.

Here is the finished shade.

 
The other great thing is that I found this lamp over the weekend at Salvation Army for $3.50. It was originally $7, but they were having a 50% off all merchandise sale. You cannot beat that! I think the shade looks great with it.

Thursday, January 6, 2011

My first post!

I have been anxiously awaiting my first post. I have sat down to write it numerous times, but for some reason never wanted to hit the publish button for fear that I would immediately want to take down my post. How silly?

Well, I have been working so hard the last few months to get our house ready for our new addition...Baby #3. I have pretty much finished up her room.  That's right, HER room.  After two awesome little fellows, we are now welcoming home a little girl! 

Well, for me a room is never finished, because I am always rearranging or changing things.  It is so much fun for me to think of how to make things more inviting or more US.  And I love the challenge of doing it without spending money.  My favorite thing to do is to shop my own house and repurpose things with a new look or function.  I also love searching through thrift stores and craigslist for treasures.

I will say most rooms are forever works-in-progress in our home.  But I am now in the last three weeks of my pregnancy, so I have decided I need to get my hands off of her room. I am starting to drive myself crazy with all the ideas swirling around in my head about what I could do.  So, here it is. I am sure I will change  a few things between now and her arrival, but I am, for the most part, very happy with how it turned out!


My mother-in-law and I made the bedding for her room. It turned out just the way I imagined.  The flower mobile was inspired by Martha Stewart's flower balls from her website and Encyclopedia of Crafts.


I found this chair on craigslist for $30 and made a slipcover for it. It was my first slipcover and it turned out pretty good. I don't know that I would tackle another slipcover any time soon, but it was worth trying it out for this project. The little footstool I found at Salvation Army for $8.  I painted the legs and recovered it with houndstooth green fabric and multi-colored piping.  The little side table (i.e. plant stand) I found for about $5 at Ross.  I plan to paint that once I have the time. The round wall art I got at Pier 1 years ago. I still love it, but I decided to paint it purple and add some more Martha Stewart flowers. I am going to hang the baby's name on it when I get the chance. Oh...the Ikea chandelier...I got that off of craigslist for ten bucks! In the store it sells for $40. I was so excited about that find!

 
A few years ago when I was visiting family in Iowa, I found these embroidery hoops for 10 cents a piece at a thrift store. I brought them home and covered them with some of my favorite fabric and used it in my living room.  I decided it would be fun to switch out the fabric and paint the hoops purple for the nursery.  On one of the small hoops I adhered flowers that I made after viewing a tutorial from  Jones Design Company.  I didn't use felt or wool, but I heavily starched plain cotton fabric and hot glued them onto the hoop.  On another hoop I "appliqued" (I think that is what you would call it) a bird on a branch using heat bonding paper...a super easy and fun project to do.


Along the crib wall in her room I would love to stencil a trellis pattern in a clear gloss.  I actually started to do it the other day, but then decided I was opening a can of worms. It is just not a project I am ready to do in the 11th hour. I just don't have the energy to finish it right now.  So, that will be a fun project for another day.

Thanks for reading my post!  Hope you enjoyed it!


Quotes


Breezy Design Company | Creative Commons Attribution- Noncommercial License | Dandy Dandilion Designed by Simply Fabulous Blogger Templates